
Configure PrintNode user
To set PrintNode print settings, you must first configure a user in the Printer Selections page. The following instructions guide you through the process of setting up a user.
- Click the
 icon and input Printer Selections.
- Select Printer Selections under Go to Pages and Tasks (page opens).
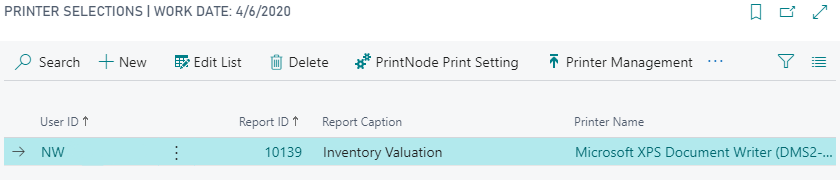
- Select +New (line appears).
- Input or select the following (changes are automatically saved):
- User ID
- Report ID
- Printer Name
Set PrintNode print settings
PrintNode print settings allow you to customize your print job. Before beginning, ensure you have set up a user in the Printer Selections page (see Configure PrintNode user).
- Click the
 icon and input Printer Selections.
- Select Printer Selections under Go to Pages and Tasks (page opens).
- Select the user line.
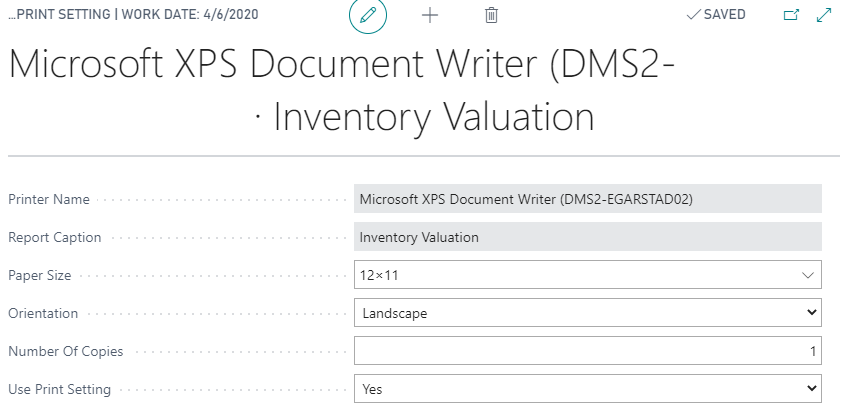
- Select PrintNode Print Setting (page opens).
- Modify the following fields, as needed (changes are automatically saved):
- Paper Size
- Orientation
- Number Of Copies
- Use Print Setting (set to Yes)
Print reports
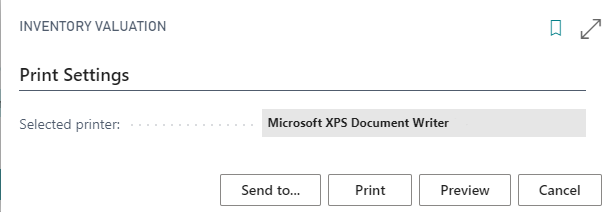
Setting up a printer and assigning it specific reports in the Printer Selections page allows you to see the selected printer specified in the report request page prior to printing.
- Click the icon and input the report type (e.g., Inventory Valuation).
- Select the report type under Go to Reports and Analysis (page opens).
- Modify the fields, as needed.
- Select Print (report prints).
Still need help?
Ask other Business Central users in the Insight Works community, or send the details to the support team. Include the steps you took and any error message you saw.